
Best Panasonic Lumix Camera by Budget: $1,000, $3,000, and $6,000 Setups Compared
Finding the best Panasonic Lumix camera for your money isn’t about chasing the biggest spec sheet or the newest sensor number. It’s about matching a system to the work you actually do. To make that decision easier, we built three complete Lumix setups at three very different price points: $1,000, $3,000, and $6,000. Each setup includes a body and the lenses that make it usable on day one, not just a camera sitting in a box waiting for glass.
The first setup delivers far more camera than its price suggests. The second is where Lumix becomes seriously difficult to beat for hybrid photo and video work. The third adds capability that only certain photographers and filmmakers will genuinely use. By the end of this breakdown, one of these budgets stands out as the strongest overall value, and it isn’t the most expensive one.
Altbuzz exists to help you put your camera budget toward the right upgrade instead of the biggest number on a spec sheet. If that approach sounds useful, subscribe before we walk through the first setup.
Why Budget Level Changes What a Lumix Camera Can Do
Every camera brand draws a rough line between hobbyist, enthusiast, and professional gear, and Panasonic’s Lumix lineup follows that same pattern. At $1,000, the goal is a complete and flexible system that removes friction for a new photographer. At $3,000, autofocus, low light performance, and video quality all take a real step forward, and the camera becomes genuinely usable for paid client work. At $6,000, the money buys headroom: faster sensor readout, quicker bursts, tougher build quality, and a broader stretch of lens coverage for people who are already pushing against the limits of what came before.
Understanding that pattern matters more than memorizing spec sheets, because it tells you which problem your money is actually solving. Camera marketing tends to lead with megapixel counts and sensor size, but those numbers rarely predict whether a system will actually work for the shoots you take on. A wedding filmmaker and a landscape photographer printing gallery-size prints can spend the same $6,000 and need completely different tools. A student building a portfolio and a parent documenting a growing family can both land on the same $1,000 kit and be equally well served by it.
That’s why this guide treats each budget as a complete system rather than a single body to research in isolation. Lenses, stabilization, autofocus architecture, and video codecs all shape how a camera performs in the field far more than the sensor spec sheet alone. Below, each tier includes the exact body and lens pairing we’d buy, what the setup does well, where it falls short, and who it’s genuinely built for, along with the honest trade-offs that get skipped in most buying guides.
$1,000 Budget: The Panasonic Lumix G97 Kit
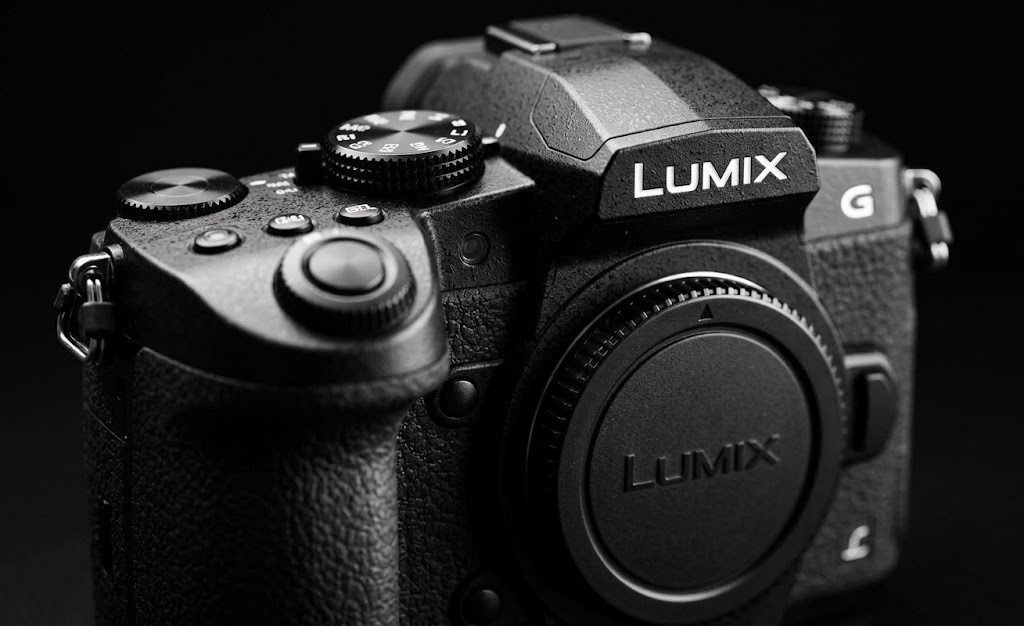
At $1,000, the tempting move is chasing the cheapest full-frame body available and figuring out lenses later. A better approach hands you a finished system instead of a half-built one. That’s the Panasonic Lumix G97, paired with the Lumix G Vario 12-60mm kit zoom and the Lumix G 25mm F1.7. Body, everyday zoom, bright prime, in-body stabilization, a viewfinder, and a fully articulating screen all come together in one box, and someone could open it and start working the same afternoon.
What’s Inside the G97 Kit
The 20.3MP Micro Four Thirds sensor isn’t the headline of this kit, and it doesn’t need to be. Five-axis stabilization means handheld shots at slower shutter speeds still come out sharp, which matters far more for everyday shooting than raw resolution does. Most new photographers lose more usable shots to camera shake than to a lack of megapixels, and this is where that stabilization earns its keep.
The electronic viewfinder and fully articulating screen make the camera usable for stills and for talking directly to the lens, a feature vloggers and content creators rely on constantly. Composing through a viewfinder in bright outdoor light, then flipping the screen forward to record a piece to camera, covers two very different shooting styles without switching gear. 4K recording and V-Log L give the G97 real video flexibility for anyone who wants to grade footage rather than accept whatever color the camera produces straight out of the body. Built-in microphone and headphone jacks mean audio doesn’t become an afterthought during a shoot, which matters the moment someone starts recording interviews or run-and-gun video content.
Weather-resistant construction and a genuinely mature Micro Four Thirds lens catalog mean this camera grows alongside a photographer instead of becoming a paperweight the moment they want more. The Micro Four Thirds mount has been around long enough that used lenses, budget primes, and specialty glass are all easy to find, which keeps the system affordable to expand over time rather than locking a buyer into a small handful of expensive first-party lenses.
Why This Lens Pairing Works
The lens pairing here is the actual recommendation, not a footnote. Too many “best camera under $1,000” guides quietly point buyers toward a body-only price and leave the lens decision as an afterthought, which almost always leads to overspending later or ending up with glass that doesn’t match how someone actually shoots. The 12-60mm zoom covers roughly a 24-120mm full-frame equivalent range, which handles travel, family gatherings, landscapes, and casual video without ever forcing a lens change. That range alone covers the majority of what a new photographer will point a camera at in a normal year.
The 25mm F1.7 prime changes the character of the kit entirely. It becomes the lens for indoor shots, portraits, street photography, and low light, and it teaches a new photographer why a prime lens feels so different from a kit zoom the first time they use one. The wider aperture blurs backgrounds more effectively, gathers more light in dim rooms, and forces a photographer to move their feet instead of relying on a zoom ring, which is often the fastest way to develop a real eye for composition.
Honest Limitations
None of this erases the G97’s real weaknesses. Its autofocus architecture is older and contrast-based rather than the newer phase-detect systems Panasonic builds into pricier bodies, so tracking a moving subject reliably isn’t a strength here. Anyone photographing youth sports, pets in motion, or fast-moving kids at a birthday party will notice the hunting and occasional missed focus more than they would on a phase-detect system.
The smaller Micro Four Thirds sensor also means a lower high-ISO ceiling than modern full-frame cameras offer, and there’s a real ceiling once the work gets demanding: sports, fast-moving kids, or tight professional client deadlines will expose the limits fast. Dim indoor venues, evening events, and anything shot well after sunset will push noise levels higher than a full-frame sensor would produce at the same settings. None of that makes the G97 a bad camera. It just means the $1,000 tier has an honest, predictable ceiling, and buyers should know exactly where that ceiling sits before they hit it.
The Lumix S9 sits right next to this conversation, since full-frame pricing has crept close to this budget territory. Looking at the full purchase changes the math quickly, though. Body-only pricing, no included lenses, no built-in EVF, and a design built around video creators rather than photographers all add real cost once you fill out a working kit. A bigger sensor doesn’t automatically build a better $1,000 system.
Who Should Buy the G97 Kit
This setup fits first-camera buyers, students, travel photographers, families, and anyone who wants a lightweight system with real room to experiment. It’s not built for someone chasing fast autofocus or shooting in genuinely difficult light, and spending more money solves exactly those two problems and only those two.
If building a complete system instead of buying a lone body sounds like the smarter way to spend camera money, subscribing means catching the next breakdown like this one.
$3,000 Budget: The Panasonic Lumix S5IIX
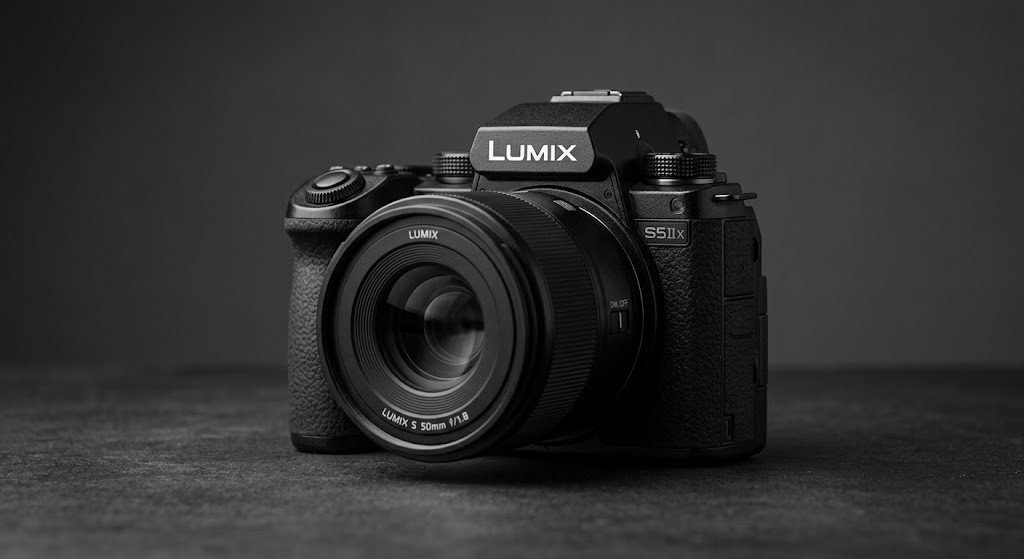
This is where the real jump happens, and not because three times the money buys three times the image quality. It doesn’t work that way. The jump matters because this is where autofocus stops struggling, low light stops being a compromise, and video stops feeling like an afterthought. Paid client work becomes realistic at this tier. That’s the Panasonic Lumix S5IIX, built around the Lumix S 24-60mm F2.8 and the Lumix S 50mm F1.8.
Autofocus and Video That Hold Up Under Pressure
Phase Hybrid autofocus alone changes what a photographer can shoot with real confidence: a kid running across a yard, a bride walking down an aisle, a subject who won’t sit still for a second take. This is the single biggest functional gap between the $1,000 and $3,000 tiers, and it shows up in nearly every real shoot rather than just in controlled test conditions. Missed focus on a client’s wedding day carries a completely different cost than a missed shot during a casual weekend outing, and the S5IIX closes that gap directly.
Strong in-body stabilization paired with Active I.S. keeps handheld video usable even without a gimbal, which matters enormously for solo shooters and small teams who can’t always carry a full stabilization rig to every location. Open Gate recording, 10-bit color, V-Log, internal ProRes support, and the ability to record RAW video to an external drive turn this body into something professional editors can genuinely work with, not just a camera that captures pretty stills. Open Gate recording in particular lets a shooter capture the full sensor area and reframe for vertical, square, or widescreen delivery later, which has become close to essential for anyone delivering content across YouTube, Instagram, and TikTok from the same shoot.
Add a cooling design built for longer recording sessions and the full L-mount lens lineup behind it, and the S5IIX stops feeling like an upgrade and starts feeling like a different category of tool entirely. Overheating during long interviews or event coverage is a real limitation on many hybrid cameras, and Panasonic built this body specifically to reduce that risk during exactly the kind of extended sessions professional work demands.
What Full-Frame Actually Buys You Here
Full-frame earns its reputation at this tier through what it genuinely changes: stronger low-light performance, more control over depth of field, wider dynamic range across shadows and highlights, and access to a far more serious range of lenses. Shooting a dim reception hall or an evening ceremony on a full-frame sensor produces noticeably cleaner files at higher ISOs than a Micro Four Thirds sensor can manage, which directly affects how usable those shots are once they reach a client’s inbox.
None of that comes free, though. Lenses get bigger, the kit gets heavier, and replacement glass costs noticeably more than it did on a Micro Four Thirds system. A full L-mount kit bag weighs more on a twelve-hour wedding day, and that’s a real, physical cost that deserves an honest mention rather than a footnote buried at the end of a spec list.
Why This Lens Pairing Works
The 24-60mm F2.8 does the real work in this kit. It’s shorter than the more common 24-70mm range, and there’s no pretending it reaches further than it does. What it does deliver is a constant F2.8 aperture in a body that stays reasonably compact for events, documentary work, interviews, weddings, travel, and environmental portraits, exactly the situations where changing lenses mid-shoot costs the moment entirely. A constant aperture also means exposure stays predictable while zooming during a live event, which matters when there’s no time to check settings between shots.
The 50mm F1.8 rounds out the kit with brighter low-light performance, real portrait separation, and a lighter alternative when the zoom feels like overkill. It’s the lens to reach for during a quiet portrait session, a candid moment between formal shots, or any time a shooter wants shallower depth of field than the zoom can produce at F2.8. Pairing a versatile zoom with a fast, lightweight prime is one of the most reliable ways to build a two-lens kit that covers nearly every situation a working photographer runs into.
Who Should Buy the S5IIX Setup
This tier belongs to serious hybrid shooters, independent filmmakers, wedding filmmakers, commercial creators, event shooters, small production teams, and anyone who needs one body that handles both stills and video without compromise. It’s also worth mentioning that the standard S5II, without the X, might genuinely be the smarter buy for someone who doesn’t need SSD recording or the more advanced codec and workflow tools. Saving that money is a completely reasonable move, not a downgrade in judgment.
This is exactly the kind of hybrid buying breakdown Altbuzz keeps building, and subscribing is how you’ll catch the next one before it gets buried in your feed.
The S5IIX setup already solves so many problems on its own that spending another $3,000 needs a real justification. So what does $6,000 actually buy, and is it worth double the price?
A quick thank you to the members currently backing Altbuzz directly. That support is what keeps research like this possible. If you’d ever like to support it more directly yourself, the membership option is there whenever you’re ready.
$6,000 Budget: The Panasonic Lumix S1II Professional Setup
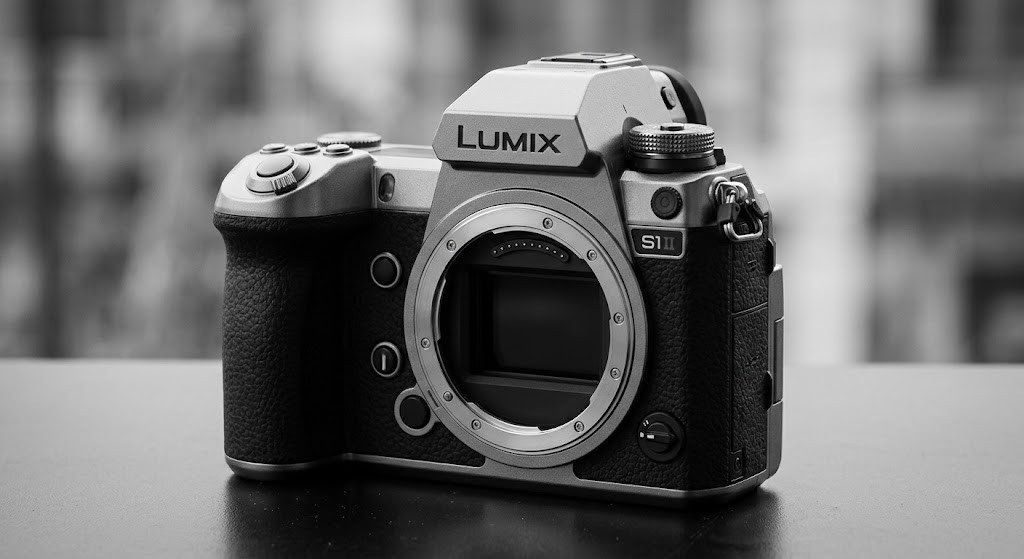
Doubling the budget from here isn’t about more megapixels, and it isn’t automatically better simply because it costs more. What $6,000 buys is headroom: faster sensor readout, higher-speed bursts, better handling under demanding workloads, faster media support, more serious video modes, and a broader stretch of lens coverage. That’s the Panasonic Lumix S1II, paired with the Lumix S Pro 24-70mm F2.8 and the Lumix S 70-300mm F4.5-5.6.
Why Sensor Readout Speed Matters More Than Resolution
The partially stacked 24MP full-frame sensor is the important detail here, and no apology is needed for staying at 24MP on a camera at this price. Professionals are paying for readout speed, burst performance, control over rolling shutter distortion, and overall responsiveness, not raw resolution. A camera aimed at portrait or landscape photographers might reasonably chase higher megapixel counts, but a camera built for fast action prioritizes something entirely different: how quickly the sensor can read out data and hand it off for processing.
High-speed electronic bursts, pre-burst capture that grabs frames before you even finish pressing the shutter, advanced autofocus tracking, strong in-body stabilization, 5.1K Open Gate recording, and high-frame-rate 4K modes all trace back to that faster sensor readout. Pre-burst capture in particular solves a problem every action and wildlife photographer knows well: the best moment often happens a fraction of a second before the shutter finishes being pressed, and this feature captures frames from just before that moment so they’re never lost. Support for CFexpress Type B and SD cards, along with SSD recording, rounds out a body built for people who genuinely cannot afford to miss a moment, since faster media keeps pace with the faster sensor instead of creating a bottleneck during long burst sequences.
What that faster readout changes in practice is simple. Fast-moving subjects stop blurring at the edges, electronic shutter distortion drops noticeably, bursts stay usable at higher frame rates, and video motion looks cleaner overall. It isn’t a spec to admire on paper. It’s the difference between catching the moment and missing it entirely.
Why This Lens Pairing Works
The S Pro 24-70mm F2.8 is where this setup stops being a strong hybrid kit and becomes a working professional system. A constant F2.8 aperture, the professional-standard focal range, tougher build quality, and weather resistance built for repeated use in bad conditions all matter more once a paycheck depends on the shot. Pro-series lenses are also built to withstand daily use over years of paid work, with sealed construction that handles rain, dust, and temperature swings far better than consumer-grade glass, which lowers the risk of a lens failure mid-shoot costing a client relationship.
The 70-300mm lens then opens up outdoor sports, wildlife, events, compressed landscapes, and telephoto portraits, and a meaningful chunk of what $6,000 buys in this setup comes from that broader glass, not from the body alone. Reaching 300mm gives a shooter enough compression and subject isolation to photograph a soccer match from the sideline, a bird from a respectful distance, or a couple’s portrait session with a flattering, blurred background, all without stepping any closer than the moment allows.
Who Should Buy the S1II Setup
This tier is built for paid professionals, sports and action photographers, demanding event shooters, wildlife photographers, commercial production teams, and filmmakers with real workflow needs. If someone can’t immediately explain why CFexpress cards, faster readout, or higher burst rates would change their work, they probably don’t need to spend $6,000 to find out.
The Lumix S1RII deserves a mention here too, as the resolution-first alternative for landscape, architecture, product, and studio work. Its 44MP sensor, strong stills resolution, and high-resolution multi-shot mode suit photographers who genuinely need to crop hard or print large. Choose the S1II for speed and responsiveness. Choose the S1RII when resolution is the actual reason for spending more. Neither one wins outright, since the right pick depends entirely on what you shoot.
If you’d rather have buying advice built around what you actually shoot instead of whichever spec sheet reads longer, that’s the whole idea behind this channel, so go ahead and subscribe.
What Else to Budget For at Each Tier
The body and lenses above are the core of each setup, but a realistic budget also leaves room for the accessories that make a camera actually usable on a real shoot. At the $1,000 tier, a spare battery and a fast SD card matter more than almost anything else, since the G97’s smaller battery and 4K recording can drain quickly during a full day of shooting. A simple camera bag and a basic tripod round out what a new photographer needs without adding much cost.
At the $3,000 tier, workflow accessories start to matter more. A second SSD or high-capacity SD card supports the S5IIX’s RAW video recording, and a set of ND filters helps control exposure when shooting video in bright daylight with a wide-open aperture. Anyone delivering client video should also budget for a basic gimbal or shoulder rig, since handheld footage, even with strong in-body stabilization, benefits from additional support during longer takes.
At the $6,000 tier, the accessory list shifts toward reliability and speed. CFexpress Type B cards cost more than SD cards but are necessary to keep pace with the S1II’s faster readout and high-speed bursts, and a second body or a dependable backup plan becomes worth considering for anyone shooting paid events where a hardware failure mid-shoot isn’t an option. A weather-sealed bag and a sturdy monopod or tripod also make more sense here, matching the durability built into the S Pro lens.
None of these additions change the core recommendation, but leaving zero room for them in a budget is one of the most common mistakes photographers make when planning a camera purchase.
Comparing All Three Lumix Setups
Lining all three setups up side by side makes the pattern obvious.
- $1,000 (Lumix G97 kit): Solves the problem of getting a complete, flexible system without overspending. Best for first-time buyers, students, and travel shooters.
- $3,000 (Lumix S5IIX kit): Solves the harder problem of building a full-frame hybrid setup that handles serious stills and serious video from the same body. Best for working hybrid creators and small production teams.
- $6,000 (Lumix S1II kit): Solves a narrower problem: speed, sensor readout, workflow headroom, and broader lens reach for people already pushing against the limits of what came before. Best for paid professionals with demanding workflows.
The jump from $1,000 to $3,000 changes the entire class of system, moving a shooter from Micro Four Thirds to a professional-grade full-frame hybrid body. The jump from $3,000 to $6,000 is real, but it’s specialized, and that’s exactly why most people should stop at the middle budget rather than assuming more money always means a better buy.
Which Lumix Budget Is Right for You
Spend to fix a limitation you actually have, not to reach the biggest number on the page. The $6,000 setup is the most capable system in this lineup, and it’s still not the smartest purchase for most people reading this. The $3,000 S5IIX kit is where the strongest overall value sits, offering a genuine jump in autofocus, low light performance, and video capability without pushing into gear most shooters will never fully use. The $1,000 G97 kit is a genuinely good camera in its own right, not a compromise, and it remains the correct choice for anyone just starting out or shooting casually.
If this breakdown helped you land on the right Lumix budget instead of overspending, that’s exactly the kind of buying decision Altbuzz is built to support. You’ll find more breakdowns like this one at altbuzzmedia.com.
Which of these three Lumix setups would you actually buy? Let us know in the comments.
Read More from Altbuzz
- Explore more Panasonic Lumix coverage, camera rumors, and gear breakdowns at altbuzzmedia.com
Subscribe to Altbuzz YouTube Channel
- Catch every budget breakdown, camera rumor roundup, and hands-on review the moment it goes live by subscribing to Altbuzz on YouTube.